Square Shade
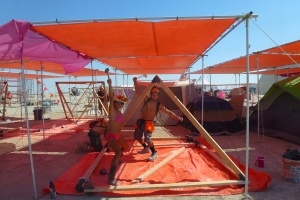
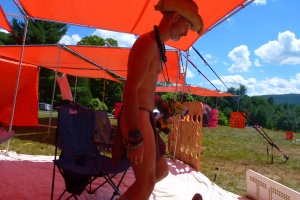
Square Shade is a modular type of shade structure that is easy to assemble and can be reconfigured to fit many designs.
Square Shade components
Fittings
We use the following 1 inch fittings:
1 inch flat roof corner (F3)
1 inch flat roof side (F4)
1 inch flat roof center (F5)
Conduit
We use 1 inch diameter Electrical Metallic Tubing (EMT) conduit.
We usually get them from Home Depot but better deals can be found elsewhere if ordered in bulk.
The EMT conduit usually comes in 10' length. We use 10' length for horizontals and 8' (we cut a 10') for verticals (legs).
Stakes and Guy lines
- Round steel stakes (length: 18" minimum, 24" is best, 36" is overkill) We usually get those from Home Depot
- Guy line (length: 16') with finished ends. Ratchet straps are needed for other tasks and should only be used as last resort.
Tarps
Orange poly tarps. Common sizes used by Disorient: 10'x10', 10'x20', 20'x20'
6" Ball bungees
Square Shade Installation
1. Assemble the frame
1. Select overall size of shade. Follow design on Urban Plan if available. Sizes often used are: 10'x10', 10'x20', 20'x20', 20'x30'
2. Select necessary components (fittings and conduit) to complete the design.
3. Position fittings and conduit on the ground where the shade is going to be used.
4. Connect horizontal conduit to fittings. The end of the fittings to which the vertical conduits will be connected must be facing the ground. For each connection, screw the eye bolt by hand then rotate a couple of times using a screwdriver or similar to make sure the conduit is tightly connected to the fitting.
5. Connect vertical conduit (legs) to fittings on the frame that you assembled in the previous step. You can install legs by yourself one by one but it is easier (especially if you are new to this process) to install legs of an entire side of the shade together (3 legs on a 20'x20' shade frame for instance) so ask a couple of friends to help you. Some people find it easier to start with the wider side of the frame especially on a 10'x20' frame. Secure each leg by screwing the eye bolt tight (same as above). Once you've done with one side, do the opposite side, then the center leg. Tighten eye bolts as you go or risk losing legs as you install others.
6. Place finished shade frame in final position.
7. Tighten ALL eye bolts one more time.
2. Install guy lines to secure frame to the ground
It is recommended to anchor the frame to the ground by securing guy line to fittings. For shade installations larger than 40'x40', vertical conduits need to be anchored every 20'. At the very minimum the 4 corners of any shade size need to be anchored to the ground.
- Drive stakes into ground 8' away from vertical conduit. Stakes should be driven into ground at 45 degree angle. In other words, guy line and stake should form a 90 degree angle. The guy lines are here for safety and have priority over visual concerns or convenience. In the case of circular shade configurations, one stake can be used to secure guy lines from the corners of two neighboring shades. Leave 4" of the stake above ground to connect guy line.
- Cover all stake with tennis ball or similar for safety.
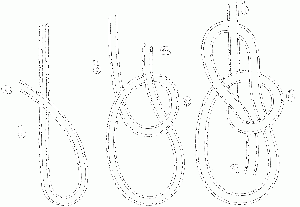
- Connect one end of guy line to the fitting with a Bowline hitch.

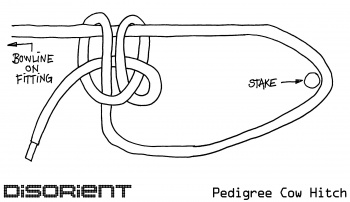
- Pass the guy line below the stake then bring it back onto itself and make a Pedigree Cow hitch so the tension of the guy line can be adjusted. The guy line should only pull gently on the frame. Tension should be equal on all guy lines.

- Make sure all vertical conduits are perpendicular to the ground and aligned. If necessary, pull-up vertical conduits to fine-tune placement of frame.
3. Install orange tarp
DO NOT ATTEMPT TO INSTALL TARP IF THERE IS WIND ![]()
When possible, especially when shade protects sensitive equipment such as a DJ booth, use tarp that matches the size of the entire frame. For example, if the frame is 10'x20' use a 10'x20' tarp instead of two 10'x10' tarps, if the frame is 20'x20' use a 20'x20' tarp instead of four 10'x10' tarps, etc. This will provide better protection against sun and rain and will not significantly affect the bird's eye effect.
Tarp connects to frame with Ball bungees.
Get a ladder or something safe to climb on. A Homer bucket from Home Depot is a good option that's often available at Disorient.
Start by connecting the 4 corners, then 4 side centers, then the missing bungees. Make sure the pull is evenly distributed throughout the whole process. In other words, the space between the tarp and the horizontal conduit should be consistent on 4 sides.
4. Flooring (optional)
Stretch canvas drop cloth(s) on the ground. We often use 8 ft. 6 in. x 11 ft. 6 in., 8 oz. Canvas Drop Cloth from Home Depot. Secure to the ground with 4-6 in. nails and fence washers on the borders of the cloth (when purchasing, make sure nail fits in washer's hole). Covering the ground with drop cloths helps prevent MOOP. It is NOT recommended to use a plastic tarp as flooring of a living area because it will collect water if it rains.
Square Shade break-down
Follow installation steps in reverse order:
1. Remove tarp.
2. Remove guy lines. Remove stakes from the ground so no one gets hurt by walking on a stake..
3. Disconnect legs from horizontal frame. Be careful not to bend conduit. Place frame on the ground.
4. Disconnect components of horizontal frame.
Safety and Maintenance
Safety
The greatest concern outdoor is shade flying away with a gust of wind. This always results in bent conduit and more importantly can hurt someone. To avoid this possibly disastrous effect it is important to keep the shade on the ground by regularly monitoring and tightening the guy lines. This is especially true for the first 3 days after shade installation as most guy lines stretch during that time.
Check the stability of the shade structure
Grab one of the vertical conduits for instance and shake the shade gently. If the whole structure moves more than 2 inches in any direction, the guy lines need to be tightened.
Rain
Rain water collected by the orange tarps can create large puddles above your head. If the tarp is correctly secured to the frame, this is not a problem. If anything the extra weight helps the shade stay grounded. You can easily remove the water by pushing the tarp up gently with a rounded object (so you don't damage the tarp). You can also lower a corner of the tarp so water flows down as it rains.


