Difference between revisions of "Square Shade"
| Line 80: | Line 80: | ||
- The [https://docs.google.com/document/d/1MhvSvf7LwauUe0Wg7xM5gWqD4NR5lliIDG2U6DBLaMY/edit DISORIENT 2023_MOOP Improvement Report] from BM advised that lag screws can be difficult to locate at the end of the event. They suggest adding a clear identifier to help locate lag screws during Disengage<BR> | - The [https://docs.google.com/document/d/1MhvSvf7LwauUe0Wg7xM5gWqD4NR5lliIDG2U6DBLaMY/edit DISORIENT 2023_MOOP Improvement Report] from BM advised that lag screws can be difficult to locate at the end of the event. They suggest adding a clear identifier to help locate lag screws during Disengage<BR> | ||
[[File:D22SquareShadeAnchor.jpg|233px]] [[File:D22SquareShadeInstall.1.jpg| | [[File:D22SquareShadeAnchor.jpg|233px]] [[File:D22SquareShadeInstall.1.jpg|283px]] [[File:D22SquareShadeInstall.2.jpg|333px]]<BR> | ||
====Old (before 2019) technique==== | ====Old (before 2019) technique==== | ||
Revision as of 19:29, 22 March 2024
Square Shade is a modular type of shade structure that is easy to assemble and can be reconfigured to fit many designs.
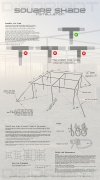
Square Shade components
Conduit
Our setup uses 1 inch diameter Electrical Metallic Tubing (EMT) conduit.
We often get Allied Tube 1 in. EMT Conduit from Home Depot.
Better deals can be found elsewhere if ordered in bulk.
This EMT conduit comes in 10' length. We use 10' length for horizontals and 8' (cut a 10' with sawzall) for verticals (legs).
Fittings
We use 1 inch fittings:
1 inch flat roof corner (F3)
1 inch flat roof side (F4)
1 inch flat roof center (F5)
Stakes and Guy lines
- Round steel stakes (length: 18" minimum, 24" is best, 36" is overkill). We usually get those from Home Depot
- Guy line are made of 1/4 in. to 1/2 in. diameter, 16 ft. long rope with finished ends. Both ends need to be taped (or burned if 100% synthetic rope) so rope does not unravel. You will need many guy lines so it is a good idea to prepare them in advance. Ratchet straps are needed for other tasks and should only be used as last resort.
Tarps
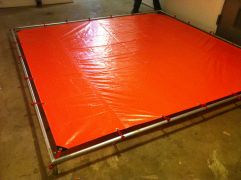
We use orange tarps because we like the color and also because they are less expensive than mesh. We found through experience that the sail effect on mesh is not significantly less than on tarps. Tarps protect better from the sun. Tarps are the way to go for Disorient's needs.
- Orange poly tarps. Common sizes used by Disorient: 10'x10', 10'x20', 20'x20'
- 6" Ball bungees
Square Shade Installation
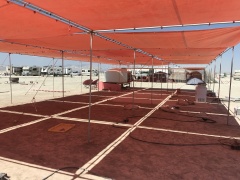
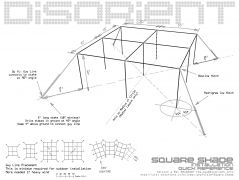
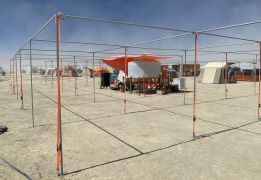
Assemble the frame
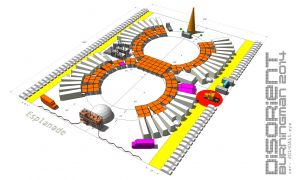
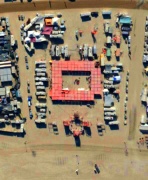
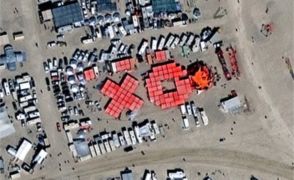
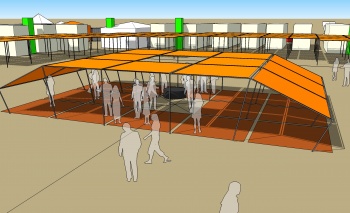
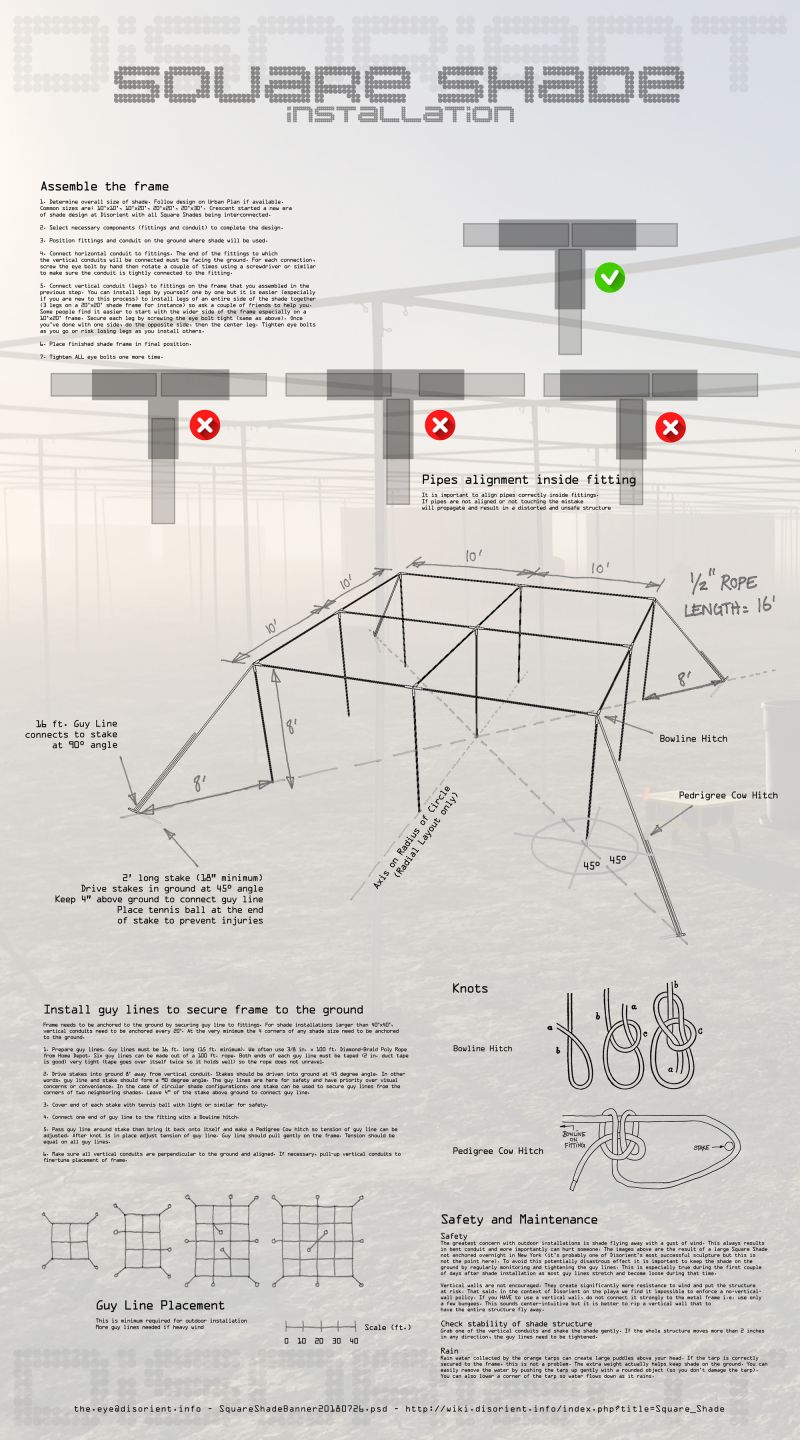
1. Determine overall size of shade. Follow design on Urban Plan if available. Common sizes are: 10'x10', 10'x20', 20'x20', 20'x30'. Crescent started a new era of shade design at Disorient with all Square Shades being interconnected.
2. Select necessary components (fittings and conduit) to complete the design.
3. Position fittings and conduit on the ground where shade will be used.
4. Connect horizontal conduit to fittings. The end of the fittings to which the vertical conduits will be connected must be facing the ground. For each connection, screw the eye bolt by hand then rotate a couple of times using a screwdriver or similar to make sure the conduit is tightly connected to the fitting.
5. Connect vertical conduit (legs) to fittings on the frame that you assembled in the previous step. You can install legs by yourself one by one but it is easier (especially if you are new to this process) to install legs of an entire side of the shade together (3 legs on a 20'x20' shade frame for instance) so ask a couple of friends to help you. Some people find it easier to start with the wider side of the frame especially on a 10'x20' frame. Secure each leg by screwing the eye bolt tight (same as above). Once you've done with one side, do the opposite side, then the center leg. Tighten eye bolts as you go or risk losing legs as you install others.
6. Place finished shade frame in final position.
7. Tighten ALL eye bolts one more time.
Install guy lines to secure frame to the ground
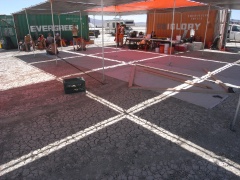
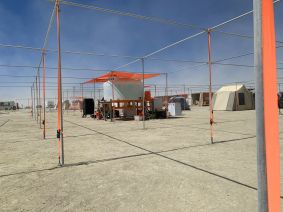
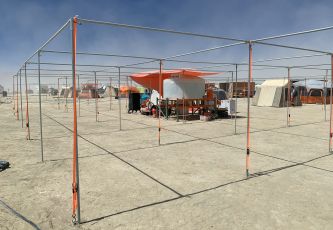
Frame needs to be anchored to the ground by securing guy line to fittings. For shade installations larger than 40'x40', vertical conduits need to be anchored every 20'. At the very minimum the 4 corners of any shade size need to be anchored to the ground.
New (after 2019) technique
Developed and sponsored by Ed B.
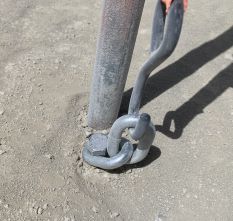
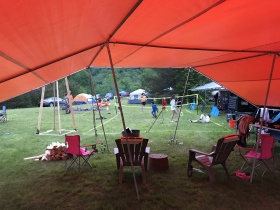
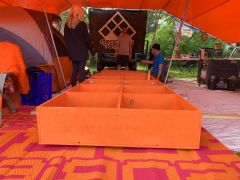
1. Screw Lag Anchors with Chain Links into ground with hammer drill 2 inches away from base of vertical pole
2. Connect top of vertical pole to Chain Link with Ratchet Strap.
PROS:
- Faster. Use of hammer drill makes install/deinstall faster.
- More streamlined. No more 45 degree angle ropes in the way so reduced chances of injury.
CONS:
- Needs electricity and power tools
- Ratchet straps more expensive than rope
- The DISORIENT 2023_MOOP Improvement Report from BM advised that lag screws can be difficult to locate at the end of the event. They suggest adding a clear identifier to help locate lag screws during Disengage
Old (before 2019) technique
1. Prepare guy lines. Guy lines must be 16 ft. long (15 ft. minimum). We often use 3/8 in. x 100 ft. Diamond-Braid Poly Rope from Home Depot. Six guy lines can be made out of a 100 ft. rope. Both ends of each guy line must be taped (2 in. duct tape is good) very tight (tape goes over itself twice so it holds well) so the rope does not unravel.
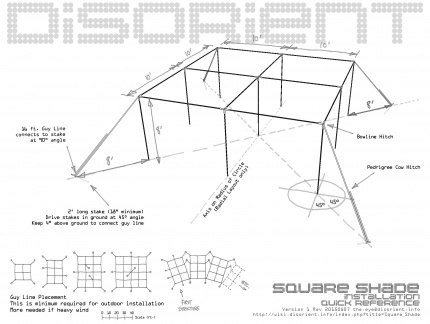
2. Drive stakes into ground 8' away from vertical conduit. Stakes should be driven into ground at 45 degree angle. In other words, guy line and stake should form a 90 degree angle. The guy lines are here for safety and have priority over visual concerns or convenience. In the case of circular shade configurations, one stake can be used to secure guy lines from the corners of two neighboring shades. Leave 4" of the stake above ground to connect guy line.
3. Cover end of all stake with tennis ball or similar for safety.
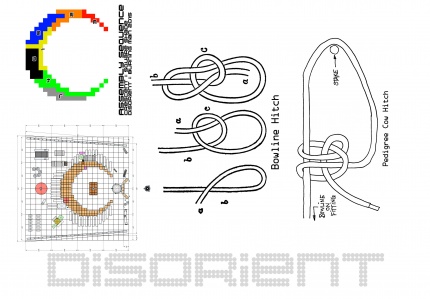
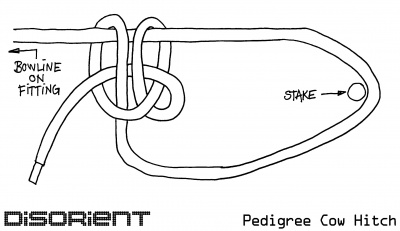
4. Connect one end of guy line to the fitting with a Bowline hitch.

5. Pass guy line around stake then bring it back onto itself and make a Pedigree Cow hitch so tension of guy line can be adjusted. After knot is in place adjust tension of guy line. Guy line should pull gently on the frame. Tension should be equal on all guy lines.
6. Make sure all vertical conduits are perpendicular to the ground and aligned. If necessary, pull-up vertical conduits to fine-tune placement of frame.
Install orange tarp
Tarp size
Sizes used at Disorient: 10'x10', 10'x20', 20'x20', 20'x30'.
Small tarps are easier to install but they use more ball bungees. Large tarps provide more protection from sun and rain since there are less gaps between tarps.
When possible, especially when shade structure protects sensitive equipment such as a DJ booth, use tarp that matches the size of the entire frame. For example, if the frame is 10'x20' use a 10'x20' tarp instead of two 10'x10' tarps, if the frame is 20'x20' use a 20'x20' tarp instead of four 10'x10' tarps, etc. This will provide better protection against the elements and will not significantly affect the bird's eye effect.
Installation process
DO NOT ATTEMPT TO INSTALL TARP IF THERE IS WIND ![]()
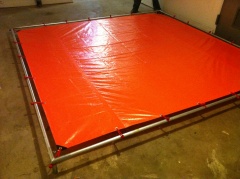
1. Tarp connects to frame with Ball bungees.
2. Get a ladder or something safe to climb on. A Homer bucket from Home Depot is a option that's often available at Disorient.
3. Start by connecting the 4 corners, then 4 side centers, then the missing bungees. Make sure the pull is evenly distributed throughout the whole process. In other words, the space between the tarp and the horizontal conduit should be consistent on 4 sides.
Flooring (optional but recommended)
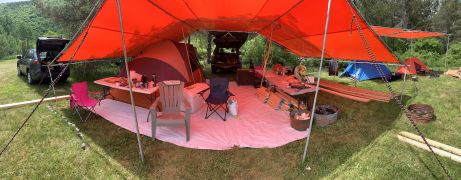
Covering the ground with Canvas Drop Cloth evens-out the surface, greatly diminishes dust on playa and helps prevent MOOP. We often use 8 ft. 6 in. x 11 ft. 6 in., 8 oz. Canvas Drop Cloth from Home Depot. It is NOT recommended to use a plastic tarp as flooring of a living area because it will collect water if it rains.
1. Determine how many drop cloths are needed to cover the surface.
2. Lay drop cloths flat on the ground.
3. Figure-out what edges of the different drop cloths will overlap so you can pin two or more drop cloths with a single nail. This greatly reduces the amount for nails needed to complete the project.
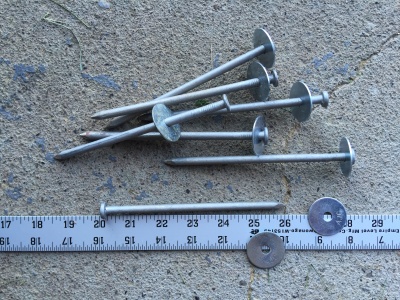
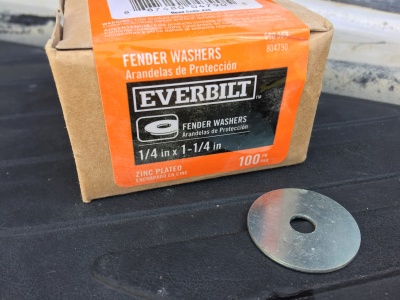
4. Secure drop cloths to the ground with 6 in. nails and 1/4" x 1 1/4" Fender Washers on the borders of the cloth. Make sure all drop cloths are stretched to the ground. Drop cloths will give a little over the first couple of days after installation so they need to well stretched during install not to buckle over time.
5. If you want to go the extra mile, throw Persian rugs (carpet remnants will do too) on your new drop clothed floor. Now you're a step closer to glamping.
6. When using a large size over and over (20'x20' between 2 containers for instance), some of us have stitched drop cloths together to create a single piece of floor cover. This greatly reduces installation time since less nails are needed.
Square Shade break-down
Follow installation steps in reverse order:
1. Remove tarp.
2. Remove guy lines. Remove stakes from the ground so no one gets hurt by walking on a stake..
3. Disconnect legs from horizontal frame. Be careful not to bend conduit. Place frame on the ground.
4. Disconnect components of horizontal frame.
Safety and Maintenance
Safety
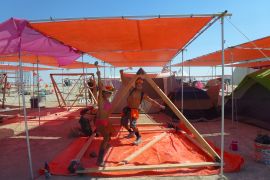
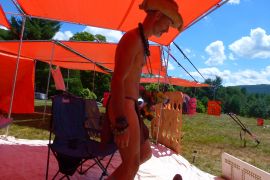
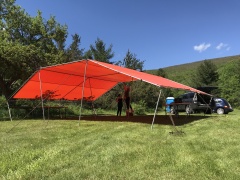
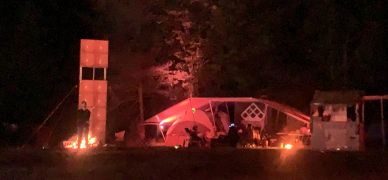
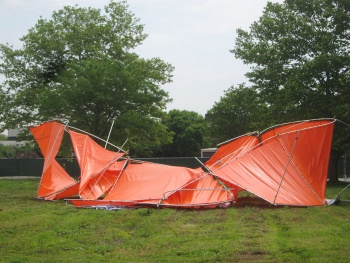
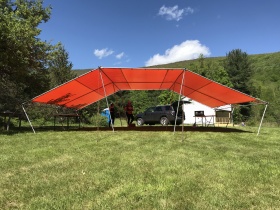
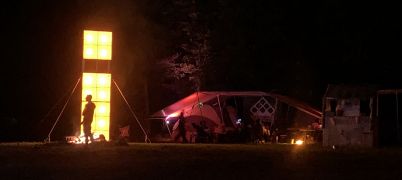
The greatest concern with outdoor installations is shade flying away with a gust of wind. This always results in bent conduit and more importantly can hurt someone. The images above are the result of a large Square Shade not anchored overnight in New York (it's probably one of Disorient's most successful sculpture but this is not the point here). To avoid this potentially disastrous effect it is important to keep the shade on the ground by regularly monitoring and tightening the guy lines. This is especially true during the first couple of days after shade installation as most guy lines stretch and become loose during that time.
Vertical walls are not encouraged. They create significantly more resistance to wind and put the structure at risk. That said, in the context of Disorient on the playa we find it impossible to enforce a no-vertical-wall policy. If you HAVE to use a vertical wall, do not connect it strongly to the metal frame i.e. use only a few bungees. This sounds center-intuitive but it is better to rip a vertical wall that to have the entire structure fly away.
Check stability of shade structure
Grab one of the vertical conduits and shake the shade gently. If the whole structure moves more than 2 inches in any direction, the guy lines need to be tightened.
Rain
Rain water collected by the orange tarps can create large puddles above your head. If the tarp is correctly secured to the frame, this is not a problem. The extra weight actually helps keep shade on the ground. You can easily remove the water by pushing the tarp up gently with a rounded object (so you don't damage the tarp). You can also lower a corner of the tarp so water flows down as it rains.
Beyond 90 degree angles
The Square Shades described above use exclusively 90 degree fittings but other angle options are available.
Since 2015 Disorient has been experimenting with 1" Low Peak 102 degree fittings to create a hybrid flat/angled roof first for the Bedouin Tech Lounge in the center of Disorient camp at BM 2015 and 2016
then for the Hut of The GlamTech Warrior starting at Country Club 2019.
These 1" Low Peak 102 degree fittings use the same conduit diameter as our other fittings so integration to our Square Shade system is seamless. Conveniently, the short conduits at the lower ends of this type of Square Shade is 4' long so we can cut 2 poles out of our existing 8' long conduits.
