Difference between revisions of "Solpix"
| (29 intermediate revisions by the same user not shown) | |||
| Line 1: | Line 1: | ||
Solpix is a modular lighting system for [[Geodesic Temple]].<BR> | Solpix is a modular lighting system for [[Geodesic Temple]].<BR> | ||
Each Solpix is a wireless stand-alone light, an individual pixel.<BR> | Each Solpix is a wireless stand-alone light, an individual pixel.<BR> | ||
Solpixes communicate with each other to create a unified presentation.<BR> | Solpixes communicate with each other wirelessly to create a unified presentation.<BR> | ||
The purpose of Solpix is to eliminate the | The purpose of Solpix is to eliminate the power and data cables needed to light [[Geodesic_Temple#Asterix_.28Burning_Man_2015.29|Geodesic Temple]] replacing them with solar power and wireless communication.<BR> | ||
==v.0.3 (20180601)== | |||
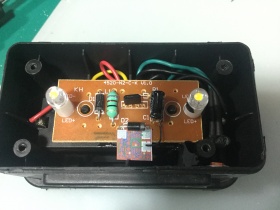
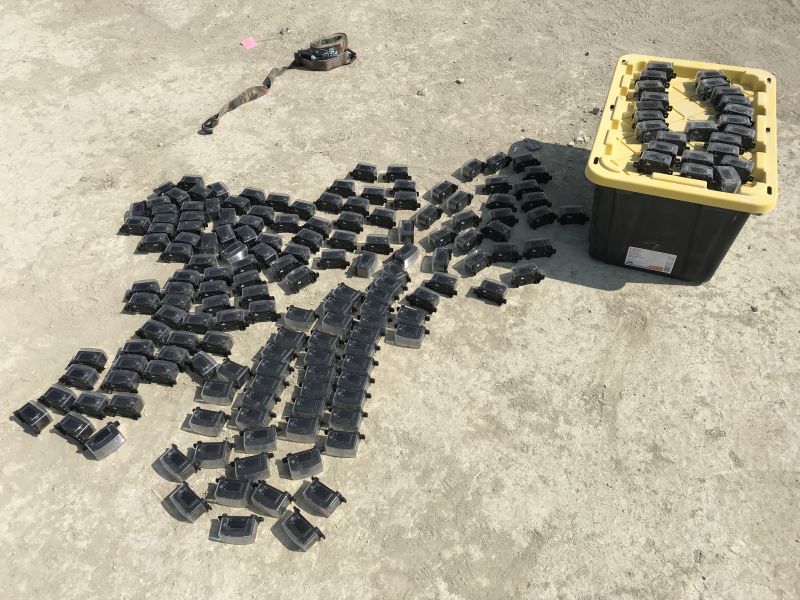
Solpix 0.3 is the modification of an existing solar light fixture by the installation of a custom piece on the board. This minimal solution doesn't support communication but each light has its own solar power plant and blinks at its own rate. Different start-time and multitude (200) of lights provide random hardware sequencing and create a no-repeat scintillating effect.<BR> | |||
[[File:SL8P-N2-BK-D2.1.jpg|280px]] [[File:SL8P-N2-BK-D2.3.jpg|280px]] [[File:SL8P-N2-BK-D2.5.jpg|280px]] [[File:SL8P-N2-BK-D2.6.jpg|280px]] [[File:SL8P-N2-BK-D2.4.jpg|280px]] [[File:SL8P-N2-BK-D2.2.jpg|280px]]<BR> | |||
Mod design and PCB fabrication by Matt M and Hong Hong in Guangzhou, China, installation by Jacob J. in Fresno, CA.<BR> | |||
Here are some photos of the design- it's about 1x.9cm.<BR> | |||
To install it, a clear plastic case on top of the solar light needs to be unclipped, then 4 screws need to be removed to uncover the electronics.<BR> | |||
Once that's done, the 'D2' diode should be clipped off the existing board (leaving as much of the leads still stuck to the board as possible), then the replacement piece should be soldered in its place as shown in the photo.<BR> | |||
Finally, a wire needs to be run from the remaining pad on the replacement piece, to the negative side of the capacitor C1. Might also need to clip off C1, we need to check if keeping it in place has any adverse effects.<BR> | |||
Watch the [https://www.dropbox.com/s/ox62jmbh4al698y/2018-08-04%2002.09.39.mov?dl=0 video] of this modification by Matt M.<BR> | |||
[[File:2018-07-27 02.45.17.jpg|280px]] [[File:2018-07-27 02.52.55.jpg|280px]] [[File:2018-07-27 02.53.51.jpg|280px]]<BR> | |||
[[File:2019SolPixTOBRIT.jpg|800px]]<BR> | |||
==v.0.2 (20170204)== | |||
[[File:Solpix.2.1.20170204.jpg|300px]] [[File:Solpix.2.2.20170204.jpg|300px]]<BR> | |||
Black: solar panel<BR> | |||
Yellow: LED<BR> | |||
Red: internal components (batteries, charge controller, electronics, etc.)<BR> | |||
Grey: metal or other structural material<BR> | |||
Dimensions: Since Solpix is designed to be installed on a 2x4 stud (actual dimensions 1.5 in. x 3.5 in.), at least one of its dimensions should be < 3.5 in. (i.e. 3 in.). The thickness of Solpix will be determined by the need for space of internal components.<BR> | |||
Installation: Solpix could be secured to a 2x4 wooden stud with zip ties (or similar) running on both sides of its base or with velcro under its base. The modular design of Solpix allows for flexible [[Geodesic Temple]] light layout. There could be one or several Solpixes on one or both sides of each 2x4. | |||
v. | Note: The multiple orientations of the 2x4 that make [[Geodesic Temple]] will result in unequal sun exposure. One possible way to reduce this inequality is to have solar panels face different directions on each Solpix as shown on v.0.1. | ||
==v.0.1 (20170204)== | |||
[[File:Solpix.1.1.20170204.jpg|300px]] [[File:Solpix.1.2.20170204.jpg|300px]]<BR> | |||
==References== | |||
http://www.nokero.com/W100-Solar-Work-Light-p/w100.htm<BR> | |||
https://www.aliexpress.com/item/5W-Solar-Powered-Panel-LED-Sensor-Light-Outdoor-Lighting-Spotlight-Flood-Light-Solar-Street-Light-Lamps/32542809632.html?spm=2114.40010308.4.80.DtfoNc<BR> | |||
http://dayatech.en.hisupplier.com/product-1204564-3w-solar-panel-PIR.html<BR> | |||
http://home.howstuffworks.com/solar-light2.htm<BR> | |||
Latest revision as of 09:51, 1 August 2022
Solpix is a modular lighting system for Geodesic Temple.
Each Solpix is a wireless stand-alone light, an individual pixel.
Solpixes communicate with each other wirelessly to create a unified presentation.
The purpose of Solpix is to eliminate the power and data cables needed to light Geodesic Temple replacing them with solar power and wireless communication.
v.0.3 (20180601)
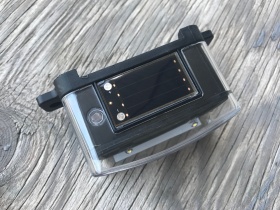
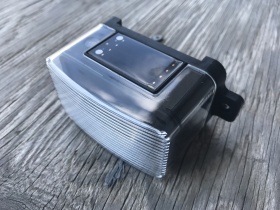
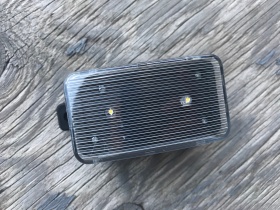
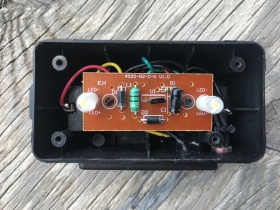
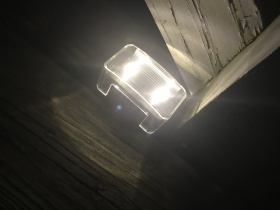
Solpix 0.3 is the modification of an existing solar light fixture by the installation of a custom piece on the board. This minimal solution doesn't support communication but each light has its own solar power plant and blinks at its own rate. Different start-time and multitude (200) of lights provide random hardware sequencing and create a no-repeat scintillating effect.
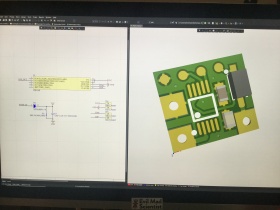
Mod design and PCB fabrication by Matt M and Hong Hong in Guangzhou, China, installation by Jacob J. in Fresno, CA.
Here are some photos of the design- it's about 1x.9cm.
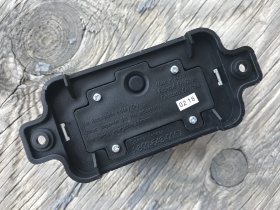
To install it, a clear plastic case on top of the solar light needs to be unclipped, then 4 screws need to be removed to uncover the electronics.
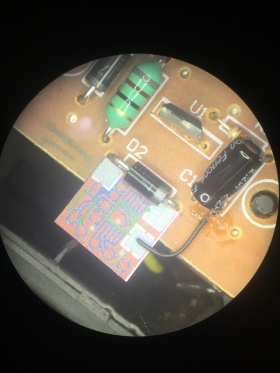
Once that's done, the 'D2' diode should be clipped off the existing board (leaving as much of the leads still stuck to the board as possible), then the replacement piece should be soldered in its place as shown in the photo.
Finally, a wire needs to be run from the remaining pad on the replacement piece, to the negative side of the capacitor C1. Might also need to clip off C1, we need to check if keeping it in place has any adverse effects.
Watch the video of this modification by Matt M.
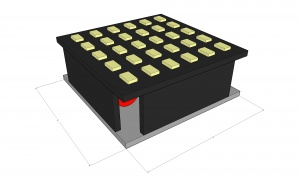
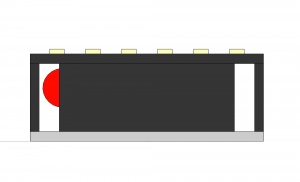
v.0.2 (20170204)
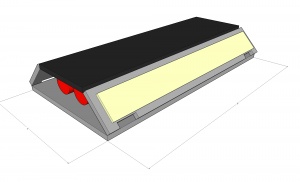
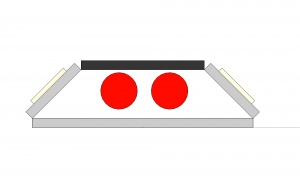
Black: solar panel
Yellow: LED
Red: internal components (batteries, charge controller, electronics, etc.)
Grey: metal or other structural material
Dimensions: Since Solpix is designed to be installed on a 2x4 stud (actual dimensions 1.5 in. x 3.5 in.), at least one of its dimensions should be < 3.5 in. (i.e. 3 in.). The thickness of Solpix will be determined by the need for space of internal components.
Installation: Solpix could be secured to a 2x4 wooden stud with zip ties (or similar) running on both sides of its base or with velcro under its base. The modular design of Solpix allows for flexible Geodesic Temple light layout. There could be one or several Solpixes on one or both sides of each 2x4.
Note: The multiple orientations of the 2x4 that make Geodesic Temple will result in unequal sun exposure. One possible way to reduce this inequality is to have solar panels face different directions on each Solpix as shown on v.0.1.
v.0.1 (20170204)
References
http://www.nokero.com/W100-Solar-Work-Light-p/w100.htm
https://www.aliexpress.com/item/5W-Solar-Powered-Panel-LED-Sensor-Light-Outdoor-Lighting-Spotlight-Flood-Light-Solar-Street-Light-Lamps/32542809632.html?spm=2114.40010308.4.80.DtfoNc
http://dayatech.en.hisupplier.com/product-1204564-3w-solar-panel-PIR.html
http://home.howstuffworks.com/solar-light2.htm
