Difference between revisions of "Pallet rack"
(→2022) |
|||
| (30 intermediate revisions by the same user not shown) | |||
| Line 1: | Line 1: | ||
Cell Lead (2004-present): Freeman<BR> | |||
== | Disorient uses [http://www.interlakemecalux.com/standard-rack/selective-pallet-rack Interlake "teardrop" style pallet rack].<BR> | ||
===Burning Man=== | |||
Freeman M. introduced pallet racks to Disorient by creating an installation at [[Camp#2004_.28Disorien4.29|D04]] on the playa. Disorient embraced pallet rack tech and used it to create structural elements for our art installations at Burning Man [[Camp]] such as the [[Art_Car_Wash|Art Car Wash]] and the [[Club_House|Club House]]. Pallet rack elements used for Disorient's playa installations are stored in our [[Pallet_Rack_Container|Pallet Rack Container]].<BR> | |||
===Vertical storage=== | |||
We use pallet rack as vertical storage at the [[Dock]] and in our [[Containers]].<BR> | |||
When acquiring new members, make sure they are compatible with [http://www.interlakemecalux.com/standard-rack/selective-pallet-rack Interlake "teardrop" style pallet rack]. | |||
==D23== | |||
Built Lead: MissDaddy<BR> | |||
Description for D23 [[Club_House|Club House]] pallet rack structure installation<BR> | |||
by Freeman<BR> | |||
[[Image:D23ClubHousePalletRack.jpg|780px]]<BR> | |||
<b>Uprights</b><BR> | |||
Move the uprights and beams close to position. When raising the uprights place the feet at the location you want. Then one or two people need to stand on the base while 3-4 people tilt up the upright to vertical. A couple people need to hold each upright while the others place beams at shoulder height. Don’t worry about precision on the beams at this stage.<BR> | |||
Do this for all the uprights in the design until you have a pallet rack ‘forrest’ with all the uprights standing and beams at shoulder height. Typically this will be several free standing rows of uprights. This is very unstable at this stage and liable to domino in a wind.<BR> | |||
<b>Stabilize</b><BR> | |||
Muscle the uprights so they are inline. Use 4” screws with 3/16” washers to screw 2x4 boards connecting the outside rows of uprights. Each 2x4 should have at least 3 screws attaching it to at least 2 uprights.<BR> | |||
<b>Beams</b><BR> | |||
Move the beams into position. The more level and vertical the uprights the easier this will be. In order to get the beam in you may need to bang it with a 2x4 or tilt the upright. You must make sure each side of each beam sits all the way down in the upright and the safety clicks.<BR> | |||
<b>Floor Supports</b><BR> | |||
Once beams are in place where a floor will be, place a 2x4 across them (4” side vertical) flush with the front of the floor and prepare to screw into the uprights like the stabilize step. You want the board to be resting on each of the beams it spans. If an upright is tilting or not level the 2x4 will float above one of the beams. Try to level the uprights as much as possible to get the floor support board resting on the beams. In cases where the floor continues on both sides of the upright you need to sandwich the upright between support boards. Use a 6” screw to secure the second support board to the first.<BR> | |||
<b>Ply</b><BR> | |||
Each floor is 12’ wide and typically uses 3 sheets of plywood. Each sheet of ply needs 3 2x4 support boards, one on both sides and one in the middle. For large floors stagger the support boards so that each one rests on 3 beams. From below this will look like long lines of 2x4s spanning the entire length of the floor, double wide where the ply connects. Screw everything together. Screw the supports to each other anytime they touch. Screw ply to the supports. Each sheet of ply should have 10 screws 3 on each edge and 2 at the ends of the floating support boards.<BR> | |||
<b>Walls</b><BR> | |||
Screw long 2x6 boards onto the outside of the uprights where the walls will go. Use at least 2 boards top and bottom for each sheet of ply. Screw thru the uprights into the wall support boards thru each available hole. Screw the wall ply onto these wall support boards.<BR> | |||
<b>June D23 Clubhouse Notes:</b><BR> | |||
The current design only has a roof. You’ll probably need to build some scaffolding to be able to place the support boards under the roof. You might consider leaving those beams in place to add stability to the structure even when you take the ply off.<BR> | |||
With just 3 2x4s supporting each of the ply floor panels the edges will be a bit soft. The current plan is not to have people up there at all so this isn’t a problem. If we did want people up there we might consider moving to 4 2x4 supports per ply floor panel.<BR> | |||
<b>Safety</b><BR> | |||
Make sure no one is under you when you’re working up high.<BR> | |||
Make sure beams are fully down in their slots and the safety is clicked<BR> | |||
<b>Material</b><BR> | |||
https://www.amazon.com/GRK-120990-Multi-Purpose-Framing-Decking/dp/B07CTHP4JB/ref=sr_1_4?crid=297IVMI6SEZFS&keywords=grk+multi-purpose+screws+x+2%22&qid=1686187797&s=hi&sprefix=grk+multi-purpose+screws+x+2+%2Ctools%2C133&sr=1-4<BR> | |||
https://www.amazon.com/GRK-ProPak-Multipurpose-Screws-270-Count/dp/B001SFBETC/ref=sr_1_3?crid=23QW5EDRX91IC&keywords=grk+r4+multi-purpose+screws+x+4%22&qid=1686187743&s=hi&sprefix=grk+r4+multi-purpose+screws+x+4+%2Ctools%2C135&sr=1-3<BR> | |||
https://www.amazon.com/GRK-772691021779-6-Inch-Containing-Screws/dp/B001PD0TQQ/ref=sr_1_14?crid=18NQWJ19BO0QH&keywords=grk%2Bmulti-purpose%2Bscrews%2Bx%2B6%22&qid=1686187829&s=hi&sprefix=grk%2Bmulti-purpose%2Bscrews%2Bx%2B6%2B%2Ctools%2C137&sr=1-14&th=1<BR> | |||
https://www.homedepot.com/p/2-in-x-4-in-x-8-ft-Prime-Whitewood-Stud-058449/312528776 | |||
X 300<BR> | |||
<b>Photos of Mars College 23 structure</b><BR> | |||
https://photos.app.goo.gl/ZwMYJem1jxwhUURp6<BR> | |||
<!--[https://docs.google.com/document/d/17LW-3Tm09XvV9eSezHUwX6r9zNtVqscerQ4U3iRzCDk/edit original document shared by Freeman]--> | |||
==D22== | |||
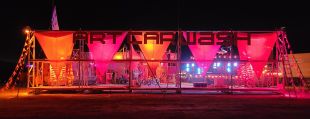
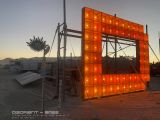
At D22 we use Pallet Racks for the [[Art_Car_Wash#2022|Art Car Wash]], as support for [[CoSign#CoSign_at_D22|CoSign "D"]] and as structure for our [[Club_House#2022|Club House]].<BR> | At D22 we use Pallet Racks for the [[Art_Car_Wash#2022|Art Car Wash]], as support for [[CoSign#CoSign_at_D22|CoSign "D"]] and as structure for our [[Club_House#2022|Club House]].<BR> | ||
[[File:D22DisorientArtCarWashNight.jpg|310px]] [[File:20220930CoSignDwithSolarArray.jpg|160px]] [[File:20220929DisorientClubHouseDay.jpg| | [[File:D22DisorientArtCarWashNight.jpg|310px|link=Art_Car_Wash#2022]] [[File:20220930CoSignDwithSolarArray.jpg|160px|link=CoSign#CoSign_at_D22]] [[File:20220929DisorientClubHouseDay.jpg|250px|link=Club_House#2022]]<BR> | ||
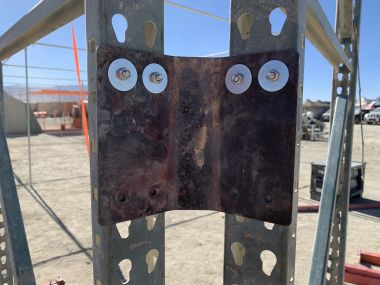
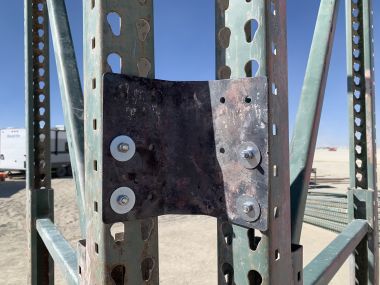
The Club House is a regular pentagon made of pallet racks. We use Geodesic Temple's [[System_of_Geodesic_Temple#Lowroad_Connector_-_connects_octahedra_together|Lowroad Connectors]] to secure pallet rack uprights at the 108 degree corners of the pentagon.<BR> | The Club House is a regular pentagon made of pallet racks. We use [[Geodesic_Temple|Geodesic Temple]]'s [[System_of_Geodesic_Temple#Lowroad_Connector_-_connects_octahedra_together|Lowroad Connectors]] to secure pallet rack uprights at the 108 degree angle corners of the pentagon.<BR> | ||
[[File:20220925DisorientClubHousePentagonalFrame.1.jpg|380px]] [[File:20220925DisorientClubHousePentagonalFrame.2.jpg|380px]]<BR> | [[File:20220925DisorientClubHousePentagonalFrame.1.jpg|380px]] [[File:20220925DisorientClubHousePentagonalFrame.2.jpg|380px]]<BR> | ||
==Pallet Rack Nest (Project, 2019)== | ==Pallet Rack Nest (Project, 2019)== | ||
by The Eye<BR> | |||
This concept led to the pentagonal design that we have used for the Club House several times on the playa since 2019<BR> | |||
[[File:UP20190225.6.jpg|400px]] [[File:UP20190225.7.jpg|400px]]<BR> | [[File:UP20190225.6.jpg|400px]] [[File:UP20190225.7.jpg|400px]]<BR> | ||
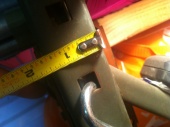
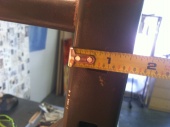
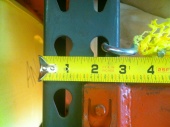
==Pallet Rack dimensions== | |||
==Pallet Rack | |||
[[image:Pallet_Rack_Dimensions_01.jpg|170px]] [[image:Pallet_Rack_Dimensions_02.jpg|170px]] [[image:Pallet_Rack_Dimensions_03.jpg|170px]] [[image:Pallet_Rack_Dimensions_04.jpg|170px]] [[image:Pallet_Rack_Dimensions_05.jpg|170px]] | [[image:Pallet_Rack_Dimensions_01.jpg|170px]] [[image:Pallet_Rack_Dimensions_02.jpg|170px]] [[image:Pallet_Rack_Dimensions_03.jpg|170px]] [[image:Pallet_Rack_Dimensions_04.jpg|170px]] [[image:Pallet_Rack_Dimensions_05.jpg|170px]] | ||
<br /> | <br /> | ||
| Line 42: | Line 83: | ||
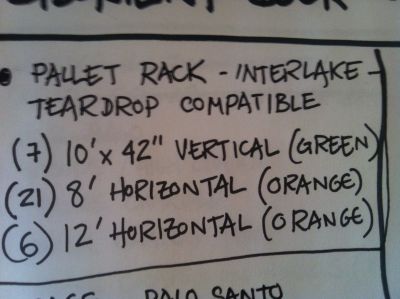
==Pallet Rack members needed for the Dock (August 2012)== | ==Pallet Rack members needed for the Dock (August 2012)== | ||
[[image:Pallet_Rack_needed_at_Dock_2012.jpg|400px]] | [[image:Pallet_Rack_needed_at_Dock_2012.jpg|400px]] | ||
Latest revision as of 17:41, 26 July 2024
Cell Lead (2004-present): Freeman
Disorient uses Interlake "teardrop" style pallet rack.
Burning Man
Freeman M. introduced pallet racks to Disorient by creating an installation at D04 on the playa. Disorient embraced pallet rack tech and used it to create structural elements for our art installations at Burning Man Camp such as the Art Car Wash and the Club House. Pallet rack elements used for Disorient's playa installations are stored in our Pallet Rack Container.
Vertical storage
We use pallet rack as vertical storage at the Dock and in our Containers.
When acquiring new members, make sure they are compatible with Interlake "teardrop" style pallet rack.
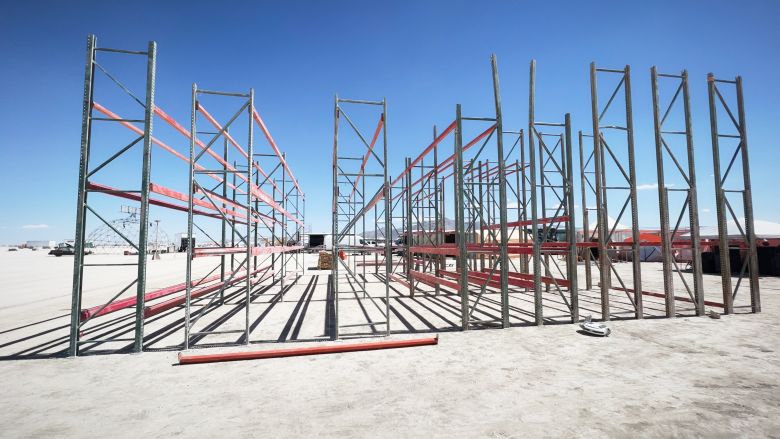
D23
Built Lead: MissDaddy
Description for D23 Club House pallet rack structure installation
by Freeman
Uprights
Move the uprights and beams close to position. When raising the uprights place the feet at the location you want. Then one or two people need to stand on the base while 3-4 people tilt up the upright to vertical. A couple people need to hold each upright while the others place beams at shoulder height. Don’t worry about precision on the beams at this stage.
Do this for all the uprights in the design until you have a pallet rack ‘forrest’ with all the uprights standing and beams at shoulder height. Typically this will be several free standing rows of uprights. This is very unstable at this stage and liable to domino in a wind.
Stabilize
Muscle the uprights so they are inline. Use 4” screws with 3/16” washers to screw 2x4 boards connecting the outside rows of uprights. Each 2x4 should have at least 3 screws attaching it to at least 2 uprights.
Beams
Move the beams into position. The more level and vertical the uprights the easier this will be. In order to get the beam in you may need to bang it with a 2x4 or tilt the upright. You must make sure each side of each beam sits all the way down in the upright and the safety clicks.
Floor Supports
Once beams are in place where a floor will be, place a 2x4 across them (4” side vertical) flush with the front of the floor and prepare to screw into the uprights like the stabilize step. You want the board to be resting on each of the beams it spans. If an upright is tilting or not level the 2x4 will float above one of the beams. Try to level the uprights as much as possible to get the floor support board resting on the beams. In cases where the floor continues on both sides of the upright you need to sandwich the upright between support boards. Use a 6” screw to secure the second support board to the first.
Ply
Each floor is 12’ wide and typically uses 3 sheets of plywood. Each sheet of ply needs 3 2x4 support boards, one on both sides and one in the middle. For large floors stagger the support boards so that each one rests on 3 beams. From below this will look like long lines of 2x4s spanning the entire length of the floor, double wide where the ply connects. Screw everything together. Screw the supports to each other anytime they touch. Screw ply to the supports. Each sheet of ply should have 10 screws 3 on each edge and 2 at the ends of the floating support boards.
Walls
Screw long 2x6 boards onto the outside of the uprights where the walls will go. Use at least 2 boards top and bottom for each sheet of ply. Screw thru the uprights into the wall support boards thru each available hole. Screw the wall ply onto these wall support boards.
June D23 Clubhouse Notes:
The current design only has a roof. You’ll probably need to build some scaffolding to be able to place the support boards under the roof. You might consider leaving those beams in place to add stability to the structure even when you take the ply off.
With just 3 2x4s supporting each of the ply floor panels the edges will be a bit soft. The current plan is not to have people up there at all so this isn’t a problem. If we did want people up there we might consider moving to 4 2x4 supports per ply floor panel.
Safety
Make sure no one is under you when you’re working up high.
Make sure beams are fully down in their slots and the safety is clicked
https://www.homedepot.com/p/2-in-x-4-in-x-8-ft-Prime-Whitewood-Stud-058449/312528776
X 300
Photos of Mars College 23 structure
https://photos.app.goo.gl/ZwMYJem1jxwhUURp6
D22
At D22 we use Pallet Racks for the Art Car Wash, as support for CoSign "D" and as structure for our Club House.

The Club House is a regular pentagon made of pallet racks. We use Geodesic Temple's Lowroad Connectors to secure pallet rack uprights at the 108 degree angle corners of the pentagon.
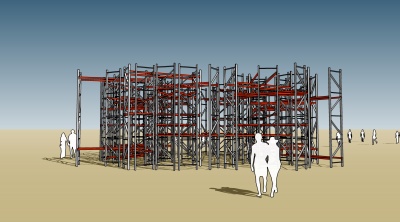
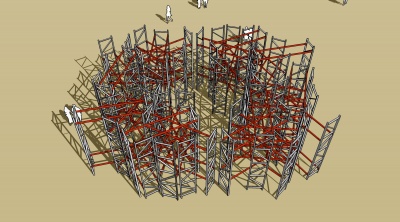
Pallet Rack Nest (Project, 2019)
by The Eye
This concept led to the pentagonal design that we have used for the Club House several times on the playa since 2019
